| Download Storyboard Tool Here! |
A storyboard is one of those tools that determines whether a course feels coherent or feels like a pile of slides someone strung together, and badly. Most of the courses we’ve seen go off the rails, lost their way in the planning stages (or the lack of planning stages), before the build even started.
If you have ever sat through a course and thought “I’m not sure where this is going”, that’s usually a storyboard issue.
What a storyboard is?
A storyboard is the plan for a course. It maps out, screen by screen, what the learner will see, hear, and do. Think of it as the architectural drawing before the building goes up.
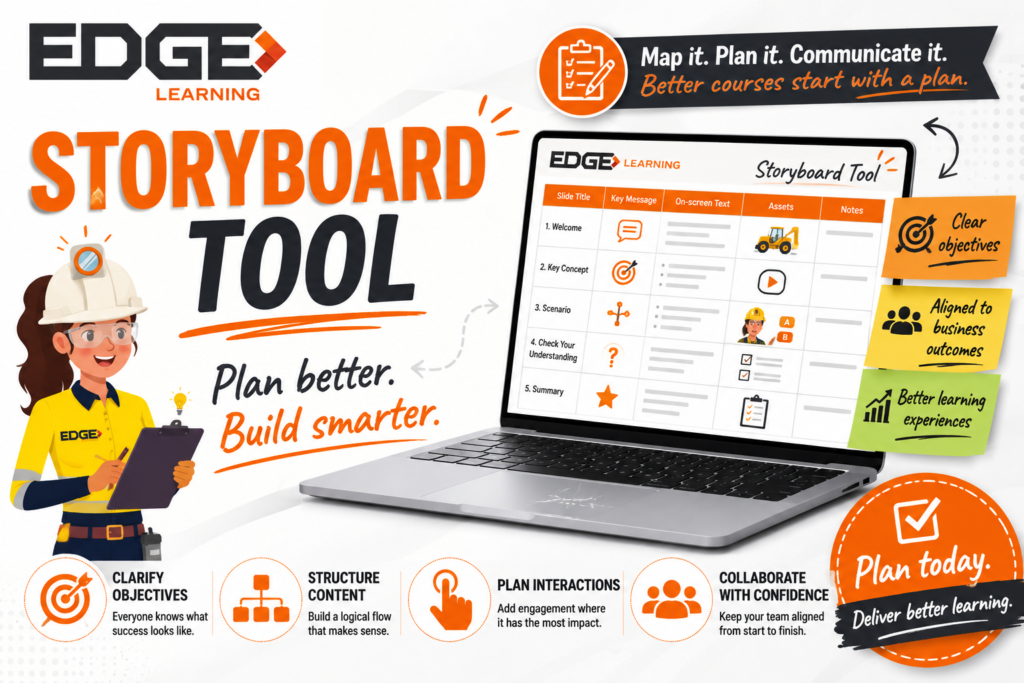
Each row of a storyboard captures one screen or learning segment: what the slide is called, the key message you want the learner to take away, the text that will appear on screen, the visual or interactive asset that supports it, and any notes for the developer or subject matter expert.
A storyboard is not the finished product, and it doesn’t need to be polished. Clarity is more important than perfect wording. The point is to think the course through before the build, not after.
What we use it for?
A few different things end up living in a storyboard, which is why it pays to use one consistently.
It clarifies the learning objectives. Writing down what each section is meant to teach forces you to confirm that each slide is doing real work.
It aligns content to the business outcome. A course exists to change something at work, whether that’s safer behaviour, faster onboarding, or fewer compliance gaps. A storyboard keeps the content focused on the outcome.
It helps you structure information logically. Concepts should build on each other. A storyboard makes a jumbled sequence obvious before you have sunk hours into voiceover and animation.
It captures opportunities for interaction. Quizzes, branching scenarios, and check-ins work best when they are planned, not bolted on at the end.
How to use the Edge Learning Storyboard Tool?
The Edge Storyboard Tool is a template that plans up to three courses, with up to five sections each. Here’s how to work through it.
Start with the Course Overview. Fill in the course title, the target audience, the delivery mode (eLearning, blended, virtual, or face-to-face), the estimated duration, and the business objective. Then list the learning objectives, note whether assessment is required, and capture any compliance or legislative requirements. This page is what every later decision will be checked against. If the business objective isn’t clear yet, sort that out before you start drafting slides, otherwise you will end up rewriting.
Plan each section. Each section has its own header with a section title, an objective for that section, and an estimated duration. Sections are how you chunk a course into digestible parts.
Fill in the slide table, one row per screen. The columns are:
- Slide Title: what the screen is called.
- Key Message: the single thing the learner should walk away with from that screen.
- On-screen text: the actual words the learner will read. Bullet points are fine.
- Assets: the picture, video, animation, or interaction that supports the message.
- Notes: anything the developer or reviewer needs to know that isn’t captured elsewhere.
Try to keep one concept per screen. If you find yourself filling three ideas into one row, split them across two or three slides. Learners tend to take more away from a clean sequence than from a busy single slide.
A few tips that make a real difference
Build understanding progressively. Explain a term or concept before you use it. It’s easy to forget what your learners don’t yet know.
Pay attention to the flow. Read the slide titles in order, without the detail, and ask whether the story makes sense. If the order feels off here, it will feel off in the finished course.
Illustrate with examples. Case studies, scenarios, and short stories tend to land better than abstract definitions, particularly for frontline audiences.
Engage the learner. Plan in a quiz, a click-to-reveal, or a scenario every few screens. The storyboard is the right place to decide where these go.
Don’t overpolish. The storyboard is a working document. It will change. Get the structure right first, then refine the wording.
When it’s done
A well constructed storyboard should let your developer know what each screen needs to do, why it’s there, and what it should look like.
If you’d like a copy of the Storyboard Tool, or help framing a course you’ve already started planning, get in touch. Happy to talk it through.